With summer in full swing, gardens and farmers markets are bursting at the seams with berries, stone fruit, veggies, herbs and more. During the peak of the season, it's hard not to let some of that fresh produce go to waste (there are only so many peach caprese salads you can eat, after all). But thanks to the experts in the GH Innovation Kitchen and to one of our favorite appliances — the freezer! — you don't have to.
By freezing fresh produce whenever you have an abundance (whether that be because it was cheaper to buy in bulk, the stores' prices were too good to pass up or your home garden is just overflowing), you can save serious money since you're cutting down on food waste. You don't have to feel guilty watching your produce go bad, then throwing it away, uneaten. And you don't need to stress about how you're going to use up 10 pounds of sugar snap peas in a week, when you know you've safely stashed them in the freezer...extending their lifespan by months!
“Storing fruit and veggies doesn’t have to be difficult,” says Kate Merker, chief food director, Hearst Lifestyle Group. Plus, it's one of the best ways to maximize how long you can enjoy in-season, peak-flavor produce well beyond its seasonal window. “Freezing is a quick and easy way to make sure you can have peak produce nearly all year round. Just think: summer corn and peaches in the middle of winter is a real treat.”
So whether you want use your frozen goods as a smoothie ingredient, the base for a cobbler or crisp or a quick mix-in for pasta, soup or eggs, this simple guide from our experts will help you harness the chill.

Important to note: The time between when produce is picked or purchased and frozen should be as short as possible. Ideally, you're preserving fruit and veggies at their peak ripeness.
Meet Our Experts

Your Step-by-Step Guide to Freezing Fruits and Vegetables
While it may be tempting to take fruit and vegetables straight from the garden to the freezer, your future self will be grateful if you take a few steps in between. Spending time to properly prepare produce now means you won't have to deal with the headache of handling fruits and vegetables when they are frozen rock-solid later. Take a cue from the freezer aisle of your grocery store, where you'll find bags of hulled strawberries, sliced peaches and mango chunks (as opposed to the whole fruit), as well as blanched green beans and broccoli florets. Here, the GH Test Kitchen breaks down the best strategies for successfully freezing all types of produce.

How to Freeze Berries
Step 1: Clean and inspect your berries.
It's best to freeze strawberries, raspberries, blueberries and blackberries soon after you bring them home from the store rather than having them sit in the fridge for a few days first. Rinse under cold running water, using low water pressure to avoid bruising the delicate fruit. Then, gently and thoroughly pat dry with towels. Take a close look at the berries to determine if they are in good enough shape to freeze. Pick the best of the bunch to freeze as-is (hull strawberries first), toss any moldy ones, and then use any that are soft or slightly mushy to make a homemade refrigerator jam — which you can also store in the freezer up to a year!

Step 2: Spread, space and freeze.
Line a baking sheet with parchment paper and spread out slices or berries in a single layer, leaving space so they are not touching. You want to make sure air can circulate, allowing for faster, more-even freezing and this helps you avoid having everything stick and clump together. The goal is to kickstart the freezing process before you transfer to another container. Freeze until frozen solid, at least two hours.

Step 3: Once frozen, transfer berries to a container for long-term storage.
Pack the berries into resealable bags, containers or jars (see Kitchen Innovation Lab favorites, below) — pressing out as much air as possible and sealing tightly to avoid freezer burn. Label with the contents and date, so you can easily find them and keep track of how fresh they are. Freeze up to one year.
Enjoy the Bounty: Berries


How to Freeze Stone Fruit

Step 1: Prep your fruit.
Handle all the stemming, peeling, pitting, slicing and chopping. That means you should peel your peaches, remove the pits from your apricots, and slice your nectarines. Basically, prepare the fruit in the manner you plan to use them later on.

Step 2: Spread, space and freeze.
Line a baking sheet with parchment paper and spread out slices in a single layer, making sure they don't touch. Freeze until firm and frozen solid, at least two hours. Note smaller items may freeze more quickly than larger ones.
Step 3: Once frozen, transfer stone fruit to a container for long-term storage.
Pack the stone fruit into resealable bags, containers or jars, pressing out as much air as possible and sealing tightly to avoid freezer burn. Label with the contents and date, so you can easily find them and keep track of how fresh they are.
Enjoy the Bounty: Stone Fruit



Q: Does freezing affect the nutritional quality of food?
A: Freezing produce is one of the best ways to lock in nutrition and flavor, especially if is picked or purchased at peak ripeness (and when it’s in season!). Research shows that frozen fruits and veggies can have vitamin content that’s the same as or even higher than that of fresh produce. (That said, blanching may slightly affect nutritional quality.) Freezing doesn’t destroy nutrients; in fact, it can preserve more of them than do other methods like canning and roasting. Most produce can maintain its nutritional quality in the freezer for at least six months.
How to Freeze Corn

Step 1: Blanch the corn.
Bring a large pot of water to a boil. While you're waiting, fill a large bowl with ice water. Once your pot is boiling, add a generous amount of salt. Add the corn cobs, making sure the corn is submerged, and cook until just tender, 3 to 5 minutes. Using tongs, transfer the cooked corn to the ice water. This immediately stops the cooking and helps the corn cool quickly.

Step 2: Prep the corn.
Pat corn dry with a towel. Using a knife, cut the corn kernels off the cobs and break corn into smaller pieces if needed.

Step 3: Spread, space and freeze.
Line a baking sheet with parchment paper and arrange corn kernels in a single layer, making sure they don't touch. Freeze until firm and frozen solid, about one or two hours.
Step 4: Once frozen, transfer corn to a container for long-term storage.
Pack the corn into resealable bags, containers or jars (see Kitchen Innovation Lab favorites, below) — pressing out as much air as possible and sealing tightly to avoid freezer burn. Label with the contents and date.
Enjoy the Bounty: Corn


How to Freeze Sugar Snap Peas
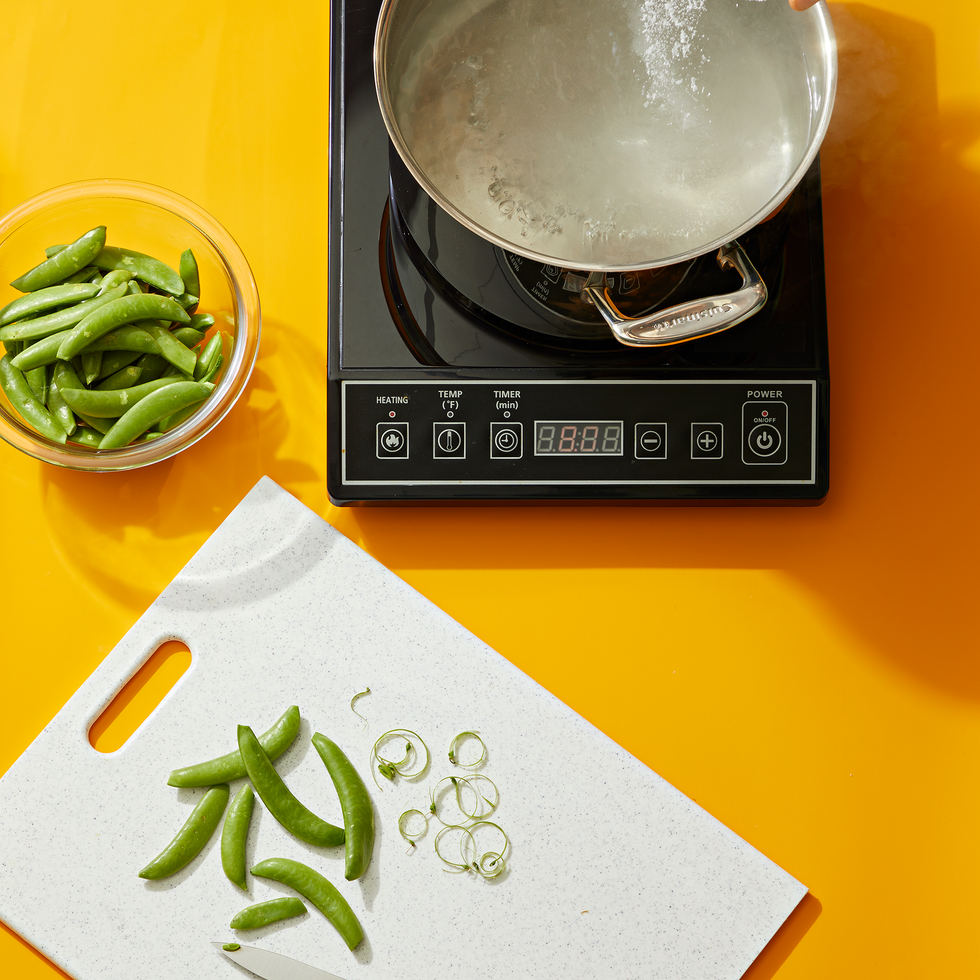
Step 1: Bring a large pot of water to a boil.
While you're waiting, fill a large bowl with ice water and trim the sugar snap peas. Once your pot is boiling, add a generous amount of salt.
Step 2: Working in batches (if needed), add sugar snap peas to boiling water.
Cook until just tender, 2 to 4 minutes.
Step 3: Transfer the sugar snap peas to ice water.
Using a wire skimmer (often called a spider) or slotted spoon, transfer the sugar snap peas to the ice water. This immediately stops the cooking and helps capture peak flavor, color and nutrients.
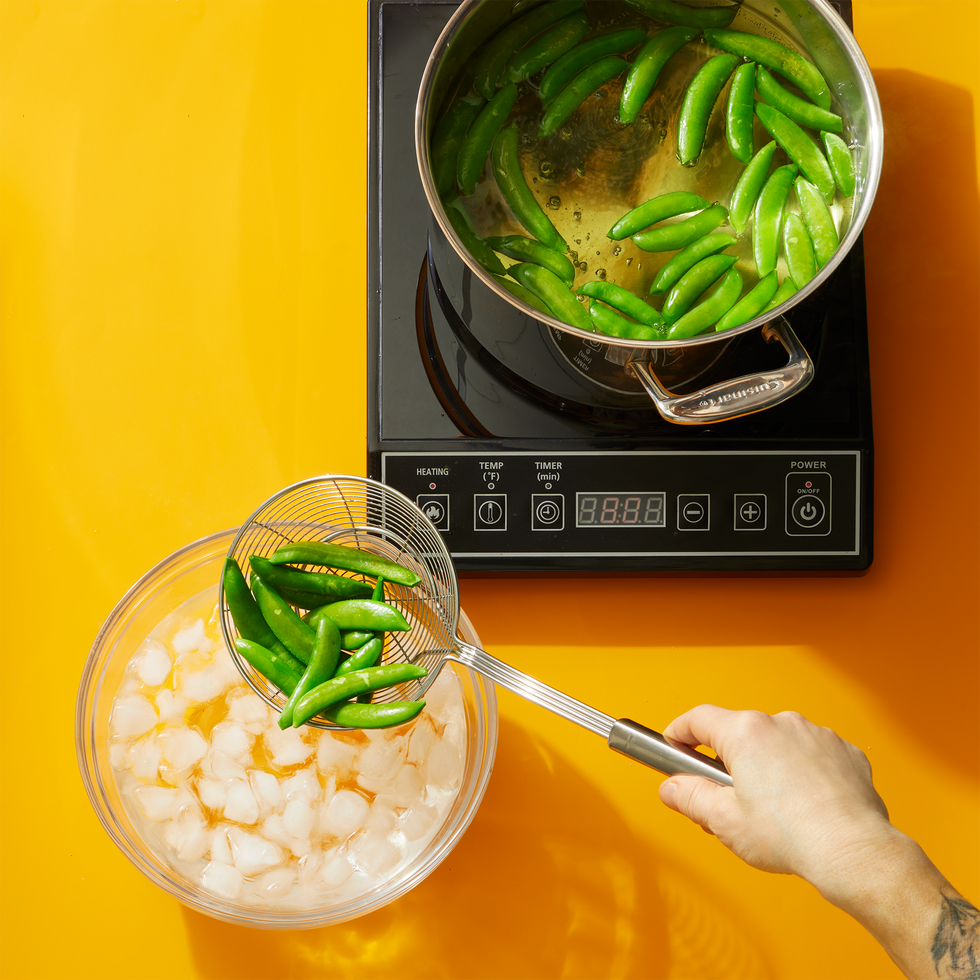
Step 4: Let them soak.
Leave them in the ice water for about 4 minutes, then using tongs, transfer the beans to a towel to drain. Repeat with any remaining vegetables, adding more water to the pot to boil and more ice to the bowl as needed.
Step 5: Spread, space and freeze.
Gently but thoroughly pat the blanched sugar snap peas dry, then arrange them in a single layer on a baking sheet and freeze until firm. This initial step ensures they don't all freeze together in a clump.
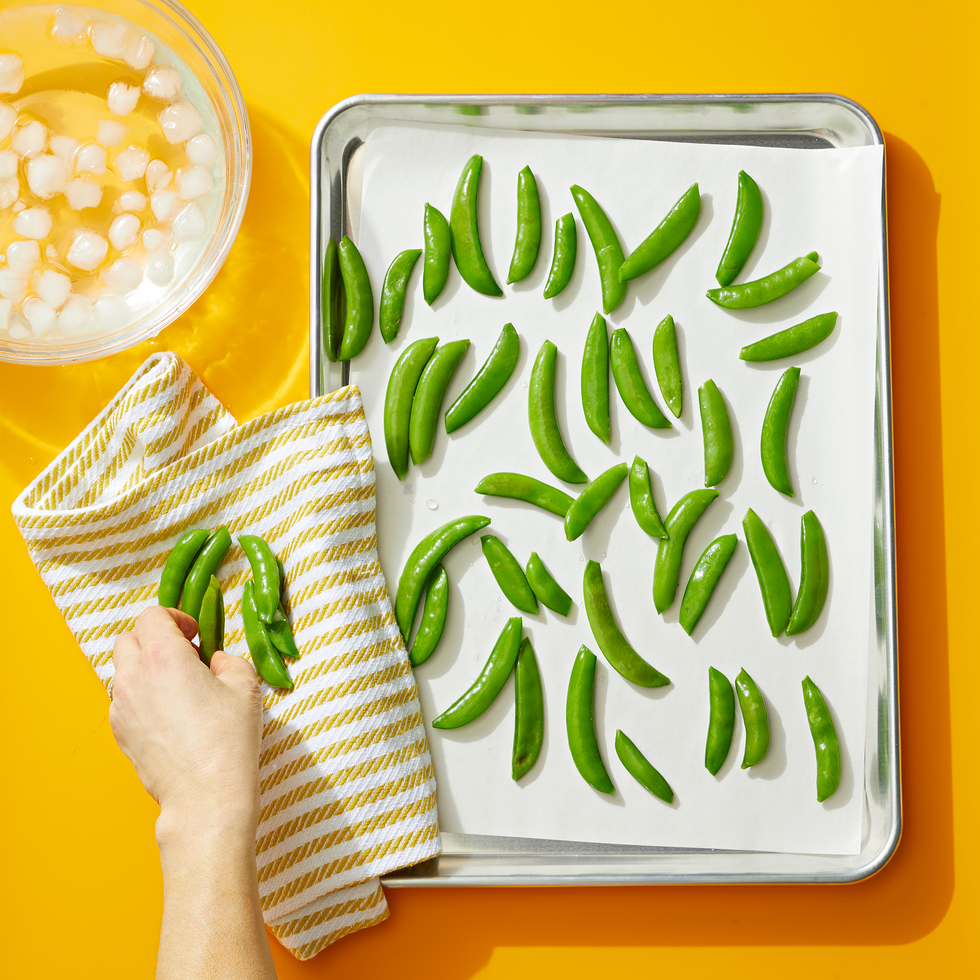
Step 6: Once frozen, pack the sugar snap peas for long-term storage.
Pack the sugar snap peas, tightly, into resealable bags, containers or jars (see Kitchen Innovation Lab favorites, below) — pressing out as much air as possible and sealing tightly to avoid freezer burn. Label with the contents and date, so you can easily find them and keep track of how fresh they are. Freeze up to eight months.
Enjoy the Bounty: Sugar Snap Peas



Q: What's the best way to freeze herbs?
A: For delicate herbs, like parsley and cilantro, you should chop them and place in a silicone ice cube tray (see "Expert-Tested Storage" below). Then top with olive oil, cover and freeze. The next time you're cooking, you can pop a cube into the skillet to instantly add an herbaceous hit.
Expert-Tested Storage
What's the best container for preserving summer produce? It depends on your plans.

Best for: Chopped herbs, garlic or ginger in oil, very small amounts of leftovers

Best for: Ingredients used by the handful or for when storage space is limited — the bags are malleable and fit into tight areas.

Best for: Almost everything, from liquids to solid food.

Best for: Firmer foods that you want to freeze right in their bags and then use up all at once; long-term storage.
Get More Freezing Tips